PhotobucketPhotobucketPhotobucketPhotobucketPhotobucketPhotobucket

Tuesday, December 11, 2012

 Snowflake Saturday Sales
This Saturday, December 15th, We have quite a few sales going on.....

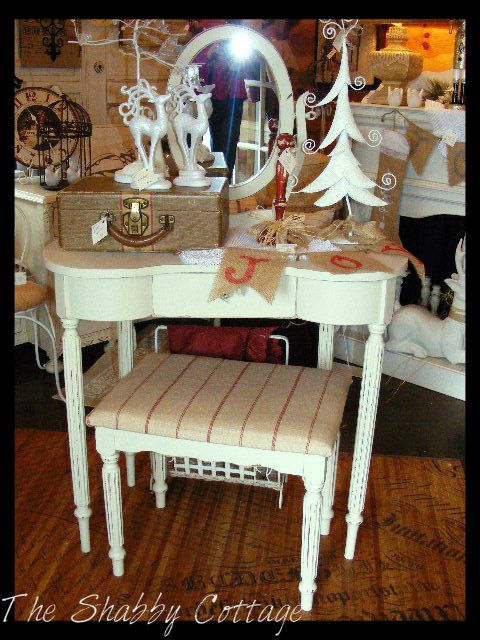
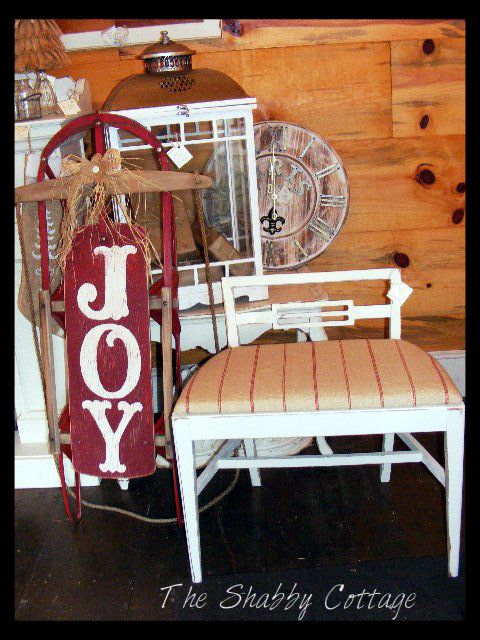
To see most of our Furniture & Home Decor you  can go to our Website......


 This is a few of our latest....Burlap Tree with little red jingle bells. I love lanterns, you can do so much with them. Your can change them for the seasons & holidays.
We have a couple of new Corner Cabinets finished. This one in our Cottage White....

 and also one in our
 French Country Black.
We have a couple of matching ones coming up.
I'll post them when we've finished them.......probably next year!

 My daughter started making this little blocks. They fit in everywhere.
Not just for Christmas.
I thought I had photos of more of them. I'll have to post them later.
They would make great stocking stuffers.


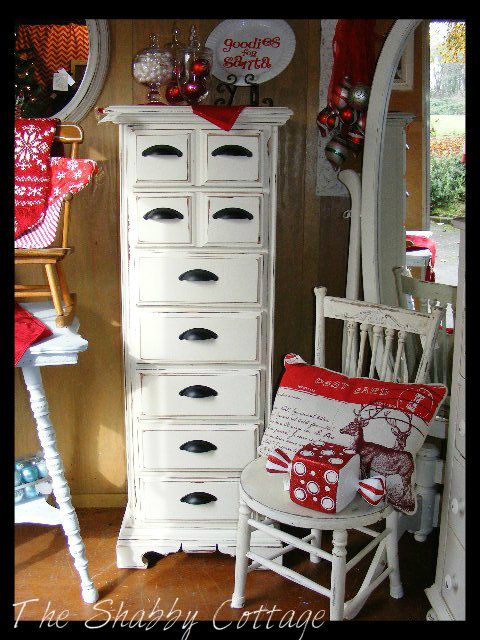
This is a little dresser my husband made with all different handles. Very eclectic! He also added a back splash on top with a decorative applique that is covered up with the clock.

Friday, November 30, 2012

I thought I would post a few of our favorite things we just finished.

This one is Shannons she finished last week. This has been such a popular size Dresser. I love all the cup handles she used.
This one is also Shannon's. She was very busy last week. I found this fabric she used on the vanity stool at JoAnn's Fabrics a couple of weeks ago. It has a grain sack look with stripes.
 I love it.
 It goes great with the Christmas Decor but it would be great anytime.


Don't you just love the sled painted red with JOY??


The Cottage White Bookcase we added the backsplash on top with a decorative applique & the Iron Corner Brackets, also the trim on the 3rd shelf.
It totally dressed it up.


This dresser has a mirror added to the top. I'm afraid you can't see it very well in this picture with all our decor on top. It also has little tin numbers in the middle of the drawers. I should have taken a close up picture.
I guess you'll have to come out to the shop to see them. lol.

Sunday, November 25, 2012

I've been wanting to blog about this for awile. When I went in to retrieve my pictures, I had to go back to August. That's when I bought it, I didn't realize I had been so slowful. I finally got it done. I love how it turned out.


My husband matched the paint for the outside with all the little cubbies and drawers inside.
I didn't want to paint all those litte cubbies. And I like the yellow color.
 I just didn't like the dark stained outside.
 It was sooo dated.


I was hoping when I got this far I wouldn't have to paint all the window type sections.
I told myself it looked fine the way it was.

I kept looking at it and new it would bug me to leave it this way.
 I just wasn't sure I would just mess it up.
But I just kept touching it up when I would get the yellow on the white, and then the white on the yellow and so on and so on, back and forth.


I painted all the original knobs and handles White so they would stand out.
I love the French Provencial Handles.
All Done.


And Here is the Before!!


Friday, November 9, 2012

Well, I'm a little late in posting this. I haven't quite gotten used to blogging yet. I add things to Facebook & Craigslist.
Now I just need to get used to posting on our Blog!!

We are having our Holiday Open House Today and Tomorrow!!
November 9th & 10th.
10:00 to 5:00

We have Gllitter & Glitz to Make Your Halls Merry!!

Please Click over to our latest email Campaign from Constant Contact for all the Details. ( and our email that I sweated over)


This all does not come naturally to me.

Making up advertising emails,
Posting on the Blog.

Anyway! Enough about my non posing abilities and on with the post.

Holiday Open House!!

Decorate, Shop & Enjoy All That Is Merry For The Season!

Now a few Pictures of Christmas Around The Shabby Cottage~~


This is the side Window peeking in from outside.

We can't forget a picture of the Cottage. We did decorate some more after this picture was taken. We'll post more later.

Tuesday, October 30, 2012

A Simple(ha ha) light Fixture Redo


Ya know when your in a store and see something fabulous that inspires you do something in your home? 
 
I have been thinking for a very long time the chandelier over my dining room table was awful, like space age, from Star Trek or something. 
 
See right?
 I've seen tutorials on making a drum shade and placing it over your existing fixture, and thought someday I will do that. 
 
I was in Cost Plus and all lighting was 30% off.  I saw the perfect shade, it was actually a floor lamp shade so it did taper up a bit, but it was so pretty and ya know 30% off, so what's a girl to do, I bought it with the intention of just placing it over my existing fixture (like all by myself). 
 
I got it home and told my husband my idea, ya he pretty much laughed at me as he usually does at my big idea's, but after I realized it wasn't going to be that easy, and it being Sunday afternoon, and stuck at home with sick kids and the pouring rain, he's like "what else have I got to do" and so it began.
 
 I was just like take off the glass bowl looking things, and then their little silver thingies that hold them off and slip over the shade,
 
See right?
 Oh wait we're definitely going to have to take down the whole fixture from the ceiling, ya this is a little more major,
 
Well that was just the beginning.  In not too long we had no light fixture at all and we weren't even sure the whole shade thing would work.  
 
 
 After we got it down, we had take the whole thing apart.  Oh my it's totally broken now what if it doesn't work?  My cheap fix is going to turn into new chandelier that I probably won't even like because I'll be too cheap to buy what I really want. 
 
And then...suddenly(ok it wasn't so suddenly but that's how all those awe-inspiring blogs out there always make it seem so I'm just gonna go with it) 
 
Ta Da,
  What do you think so much better right?  (I'm workin' on taking better pics and photobucket wasn't helping at all), but I could not love it more, and how great is my husband, with his doubting wife along side he pretty much took the whole thing apart and put it back together, and hung it by himself (he wouldn't want me to say but he actually did it one handed) ya he's pretty amazing. 

And here is the left over parts, I had to pick up my daughter and he had it all cleaned up before I got home so I had to take a picture of  it in the garbage.

 
doesn't seem like there is something I could do with these, any creative ideas out there?
 
No more space-age chandelier, Yay!

It's not something for the cottage, but I thought it was a pretty good update (and by the way it only cost $24.50) so I thought I would share.
 

Thanks so stoppin' by!

                                                                                 Katie

Wednesday, October 24, 2012

Lamp Makeover


Hi, This is actually the first time I've posted a before and after. This is Faye. Katie, my daughter has been doing the posting up until now. I'm hoping to help her out once in a while by adding post too.

She was hoping when we started this blog that My daughters and daughter in law would all take turns each week posting but Katie has been doing all the posting.

She has four kids and a lot to do sooo I was going to try to take some of the burden off her.


I've had this lamp for a while and wanted to do something to be more in style.
One of my customers came in the shop and gave me a sample of CC Caldwell Chalk Paint in Grey.
Sooo Perfect for me to try, I already had Anne Sloan's White Chalk Paint.


I painted the whole lamp in grey , then highlighted the trim in white.
I tried antiquing it with some minwax stain ~~~ Mistake!!!
I had to repaint it.

Then I waxed it with colored wax. That did the trick, I love how it turned out.
I didn't actually take a close up picture of the base when I finished it, (first time doing a tutorial) LOL
  
Now for the old fashioned shade.
I thought a drum shade  would be simpler to cover but I have a lot of this shaped shade.
No Drum Shades!

I Measured my burlap to go all around the base of the shade, Wide enough for trim at the top and at the bottom.
I glued it all around the bottom using fabric glue but I also ended up using my glue gun.
I glued the seam closed, I started at a corner.


 Next I tacked it at each side at the top with glue.


Then came the corners. I measured ( just by sight) and tacked it in the center.
Then pleated each corner so it met in the middle of the corner. Tacking with glue as I went around.

Pleat each corner and Ta Da  all done!

But I thought it lacked something so I found some burlap trim I had and it just finished the look.


I had to go buy more trim, When I was at Joanne's Fabric and Crafts, I also found these wonderful little crocheted roses.
I think it adds a great touch!!
I Shared on The Open House Party at
No Minimalist Here
http://nominimalisthere.blogspot.com/2012/10/open-house-party_24.html

Wednesday, October 17, 2012

Simple Halloween Signs...& an Invite


    Hello, so if you happen to be in the area...consider yourself

         Invited to Our        
 
 
3rd Annual Spooktacular Evening!


October 19th ** 5:00pm ~ 8:00pm


**Spook~up Your Home For Halloween!**
30% off all Halloween Decor!!
 
 
"Treat Yourself To A Haunted Evening"!!
 
"Hot Spiced Cider and Special Treats"!
 
Spooktacular Savings ~~ Friday Night Only!!
* Enjoy 15% of Your Favorite, Most
 
Amazing, Startling, Classic, Fresh,
 
Super~Cute, Hip Item!*
 
(Excludes Furniture)
Come in Costume and get 20% off two items
 
 of your choice!! (Excludes Furniture)
 
     We would love to see you there

But if you can't make it I thought I would share a simple way to "spook up" your home on your own.


So I wanted to make some simple Halloween signs for our Annual Spooktacular Evening. 
I picked up some wood wall hangings at Goodwill, and got to work, I sanded...a lot, but if you look close you can still kinda see the old paintings or in the case of the large black one the wood burnt pictures showing through, (my husband and my son kinda cringed at painting over the buck and elk wood burning...art?  Sorry SNP from 1985).  I don't think anyone will notice so shh it's just between us. 
Next I primed, painted and distressed, then the oh so satisfying result of my Cricut words, so fun.  I totally recommend this project Goodwill has no lack of tacky painted wood plaques, and if you don't have a Cricut there's lots of tutorials on transferring words onto wood out there.  I'm saving the other pieces for some Christmas signs.

Here's the Before...

And After...


                                        Katie